Contact Records in Dynamics 365 Part Two: Creating a View
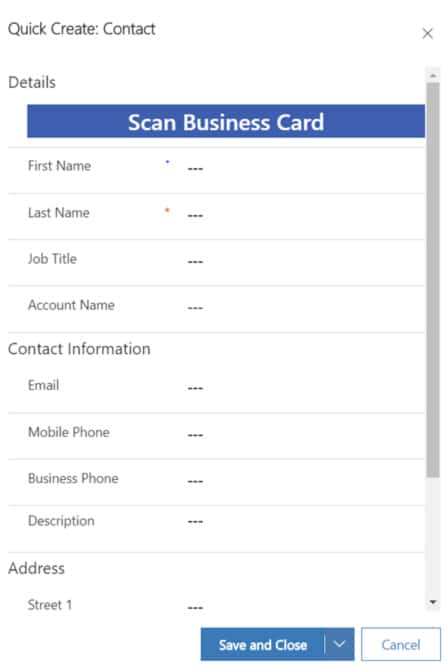
In part 1 of this series, we discussed attending a trade show and using the new scan a business card feature to create a new contact.
In this part, we will show you how to create a view based on the information you acquired.
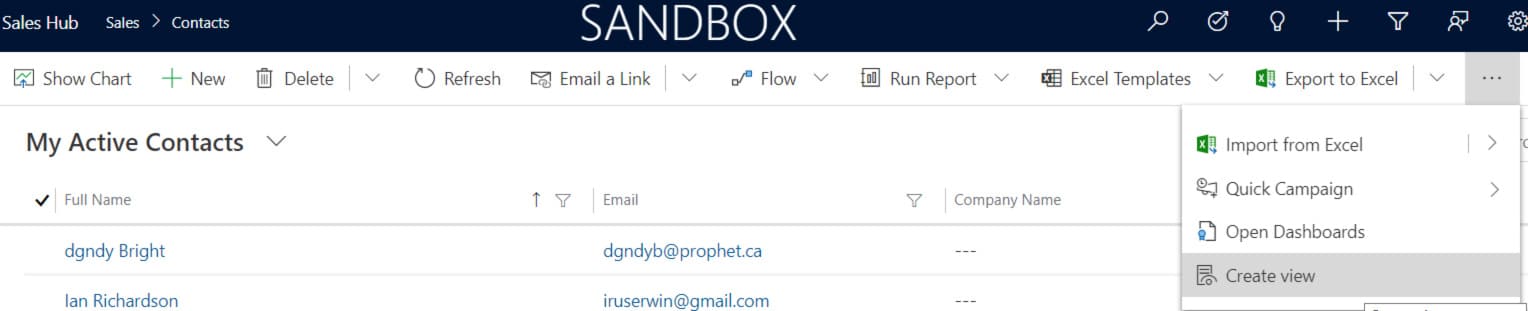
Now you want to view the contacts that you got at the show. You can make your own view of the data. Click the ellipses button to select Create View.
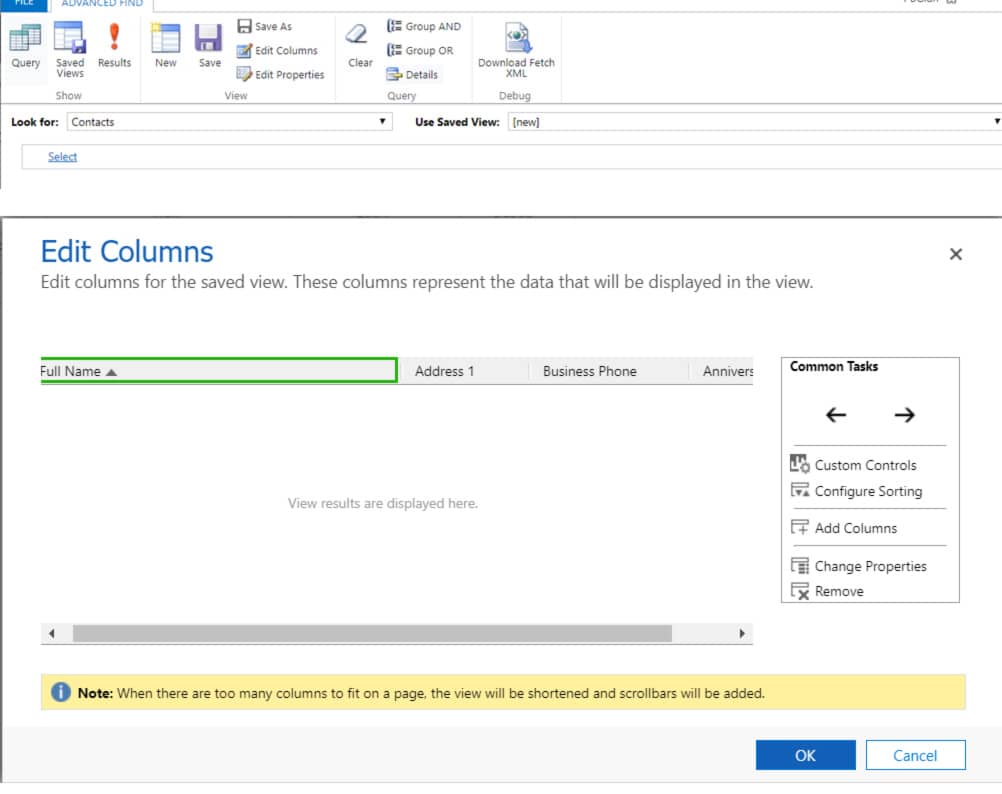
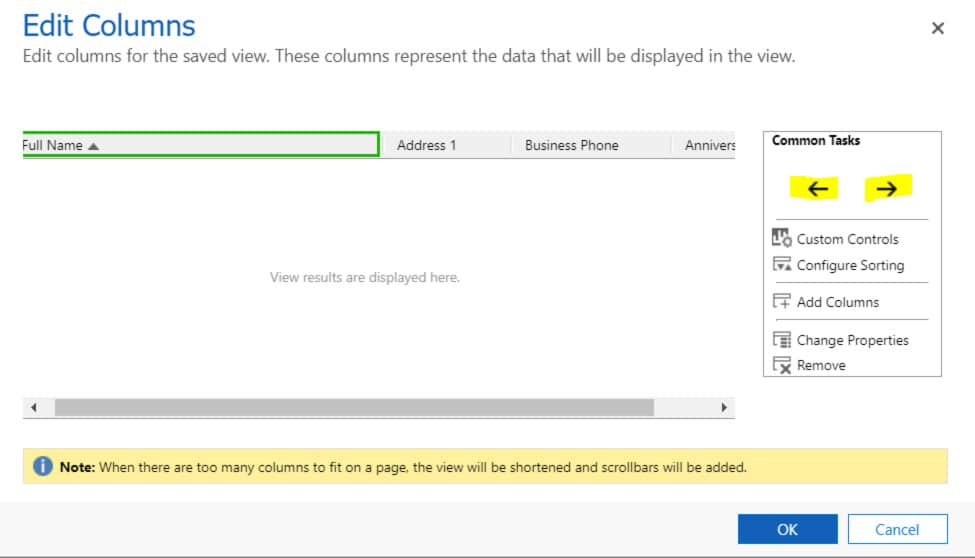
Click Add Columns to view the additional fields that can be added to the view of the data.
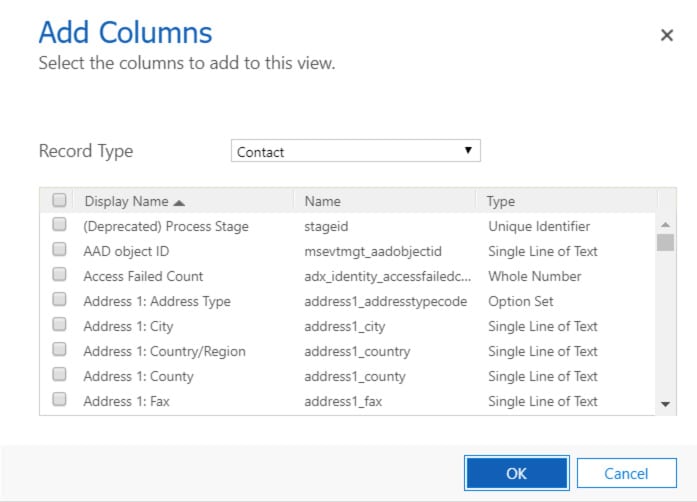
Choose the columns that you want to add.
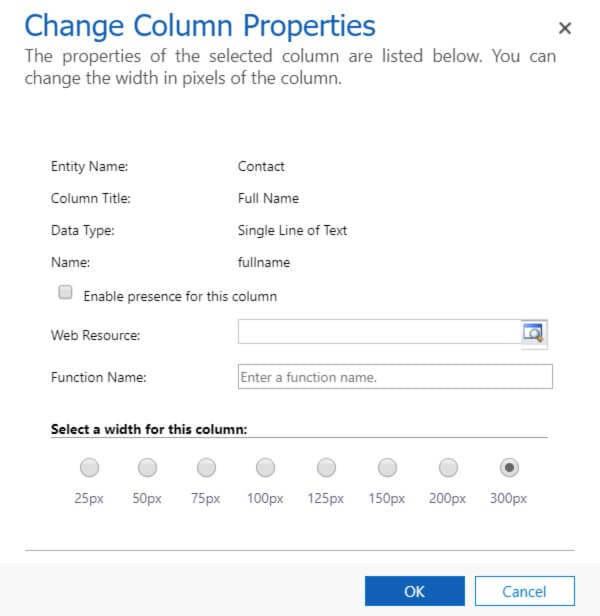
Use the column properties to set the field widths. You can also add fields coming from related entities by changing the record type from the dropdown list. Web resources and functions can be used here to display custom icons or tooltips. You can also add a URL-formatted field to open a custom window.
The new columns are added to the right of the active field (shown in green). If the columns need to be moved use the right-left arrow.
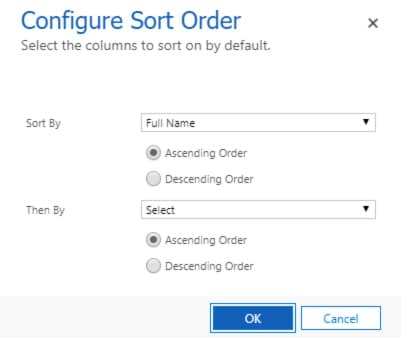
Adjust the sorting options of the data view.
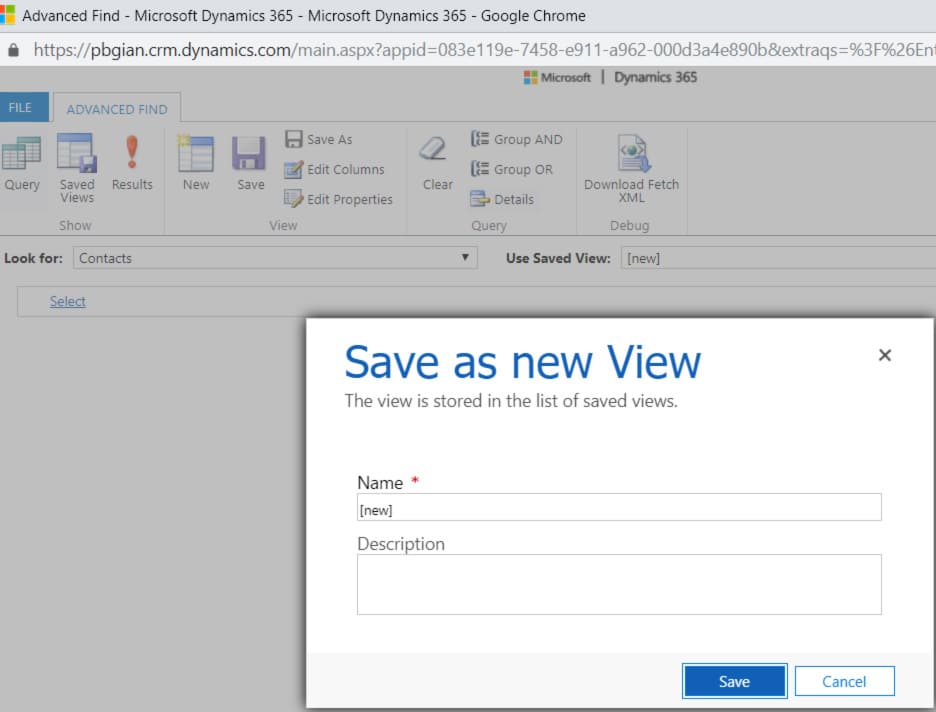
When you have the data that you want to see in the view click save.
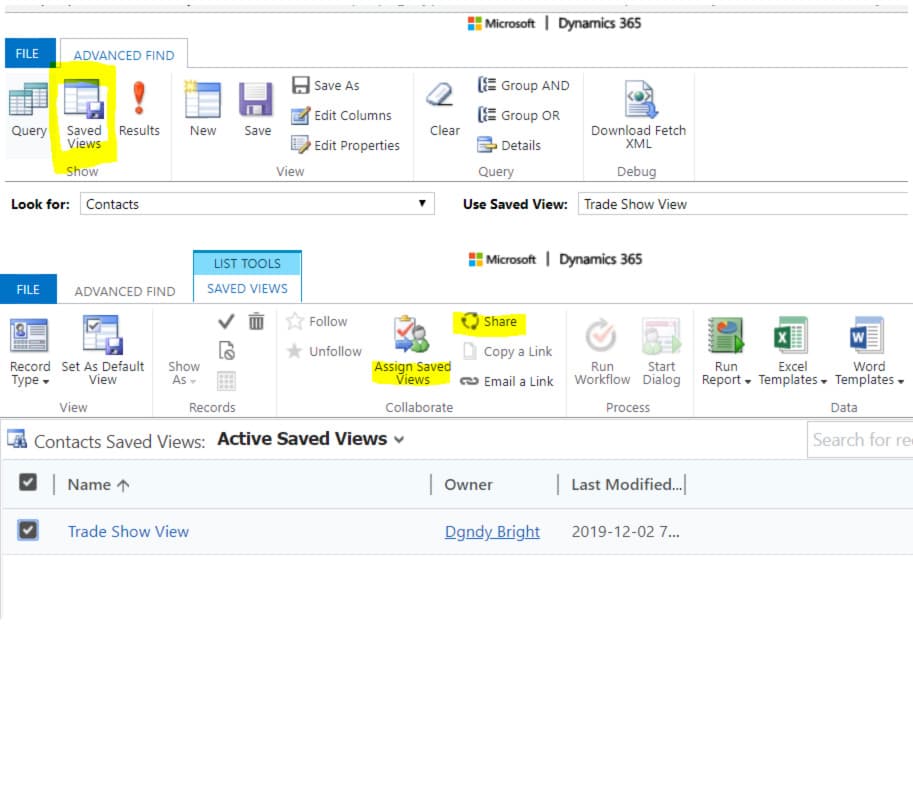
The new view is available in the active views as a personal view. A personal view will be available for only the user who created the view unless the specific user shares the view with other people, but a system view will be automatically available for everyone in the organization. Teams or people you collaborate with can leverage personal views by sharing the views. To share select the Advanced Find “funnel”.

The view you’re going to share must be a Saved View. Go to that view by clicking the Saved Views button and then select the Personal View you wish to Share, then Select Share. You can also assign a new owner to your saved views.
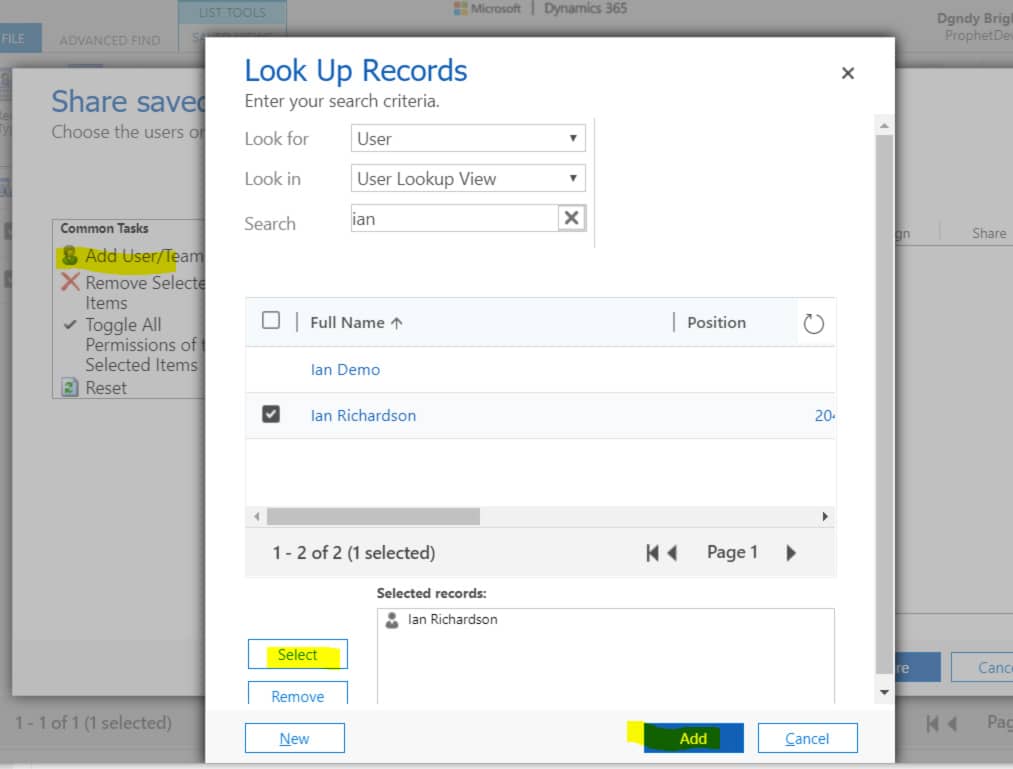
After selecting Share, select Add User/Team. Then, Search for or Select the Team or User you wish to share the view with. Hit Select to make them appear in the Selected Records box, then hit Add to confirm:
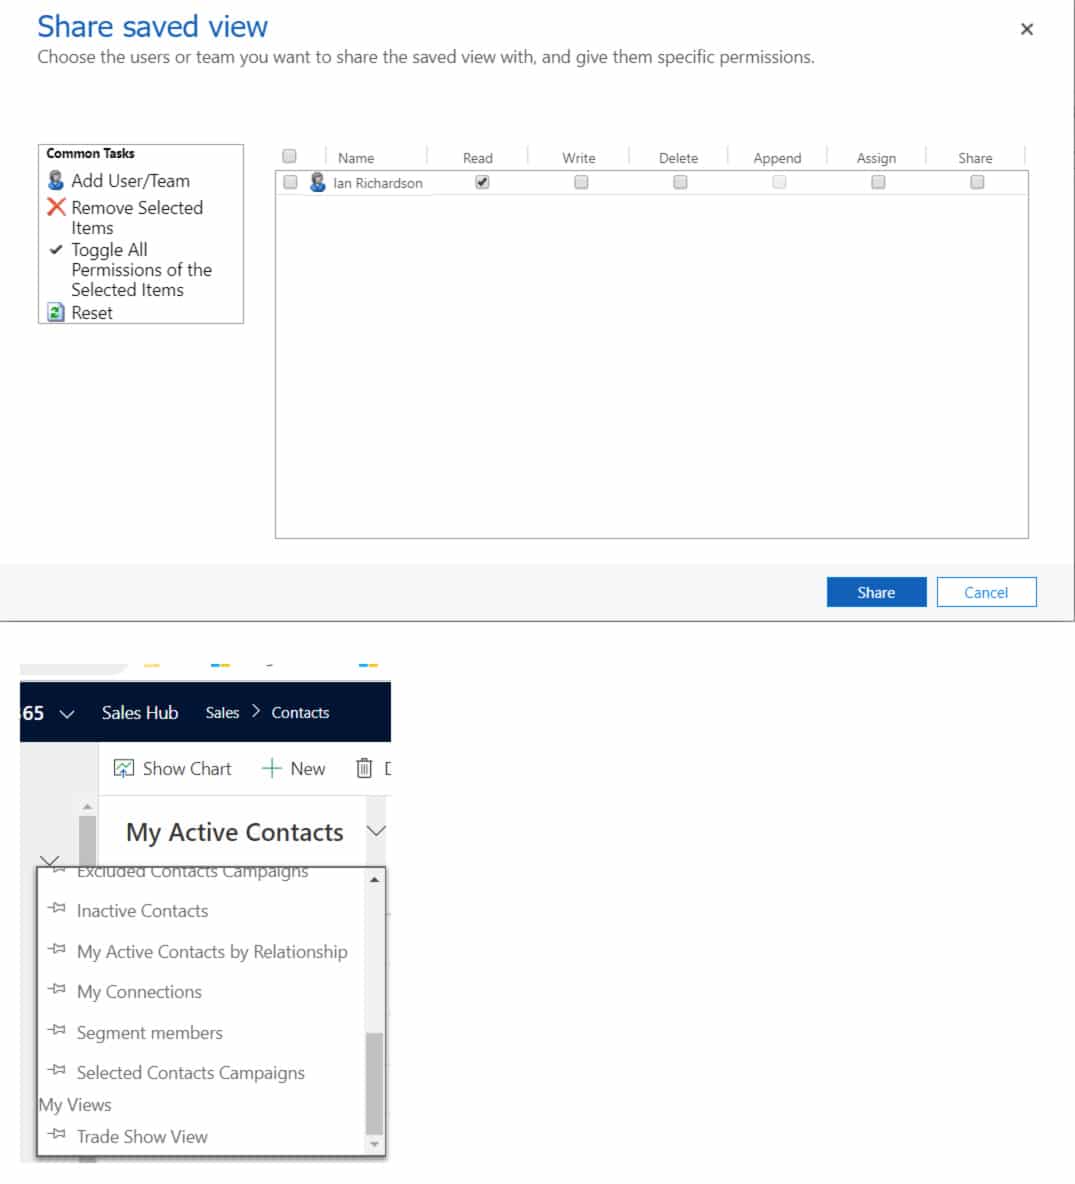
You can then manage each user’s permissions. They can Read, Write, Delete, Assign, and Share the Personal View. Click Share when you’re ready:
Questions?
If you have any questions about this or anything else, email our support team.
Under the terms of this license, you are authorized to share and redistribute the content across various mediums, subject to adherence to the specified conditions: you must provide proper attribution to Stoneridge as the original creator in a manner that does not imply their endorsement of your use, the material is to be utilized solely for non-commercial purposes, and alterations, modifications, or derivative works based on the original material are strictly prohibited.
Responsibility rests with the licensee to ensure that their use of the material does not violate any other rights.